Moda Tasarımcı eğitimi aldığım dönemde takı tasarımı dersi de almıştım fakat hiç severek katıldığım bir ders değildi. Fakat son günlerde aksesuar tasarımına ilgi duymaya başladım. Sizinle takıp ettiğim bloglardan birisinde rastladığım bir takı tasarımını paylaşmak istiyorum.

1) To determine how wide the casing should be, wrap the fabric around your bead and make note of how much fabric was used. Next add a 1/2" to the measurement. The 1/2" will account for the 1/4" seam allowance. Note: If you are sewing with a stretch knit fabric, only add about 1/4" for the seam allowance (fabric will stretch). Cut your strip. We will adjust the length of the strip later.
2) Fold the strip in half lengthwise (right sides together). Stitch along long edge of strip (opposite of fold) using a 1/4" seam allowance. Do not stitch short ends.
3) To determine the necklace's length, tie the fabric casing around your neck to length you want the necklace to hang. Be sure to tie a bow, because this is how you will attach your necklace. You want to account for the amount of fabric used in the bow. Cut off the excess fabric. You may find that you don't need to cut off any fabric

4) Dab the fabric ends with fray check. This step is optional. The fabric I used does not fray, so I didn't use fray check.
Step 2. Add the beads and tie off
1) Insert one bead at a time through the casing. How many beads is up to you. I used 10 beads. Make sure the beads are centered in the middle of the casing.
 2) With matching thread, wrap and tie off the end of the right bead.
3) Insert your needle under the fabric and pull the thread through. Try to get the needle through the fabric to the space between the next bead. If you are unable to pull the thread through in one big stitch, simply insert the needle back into the area it came out and work your way to the space.

4) Once the needle and thread have reached the space between the 2 beads, wrap the thread around the space. Wrap it nice and tight, then tie a knot to secure. Do not cut the thread.

5) With the needle still threaded, repeat the last 2 steps (3 & 4) to the end of the necklace. If you run out of thread, tie a knot to secure the thread. Begin where you left off with a new threaded needle.

Next we'll make the flowers. Before we begin, I must mention that the flowers look best when they are not perfect. I like the frayed edges and awkward folds, so try not to be perfect about the flowers.
Instructions:
Step 1 Cut fabric strip

Step 2 Roll the fabric to make the flower
 Good news! I have removed the chipped glitter nail polish after taking this pic.
2) Fold the fabric strip down in a 90 degree angle and continue to roll the bud (fabric roll) over the 90 degree fold.
Instructions:
Step 1 Cut fabric strip
1) Cut a 3/4" by 22" strip of fabric. The strip doesn't have to be 22" long - it's just a starting point. How long the fabric is will determine the thickness of the flower.
2) Fold the strip in half lengthwise and press.
2) Fold the strip in half lengthwise and press.
Step 2 Roll the fabric to make the flower
1) Roll one end of the strip a couple of times. Anchor the roll by stitching the edge of the fold.
Good news! I have removed the chipped glitter nail polish after taking this pic.2) Fold the fabric strip down in a 90 degree angle and continue to roll the bud (fabric roll) over the 90 degree fold.
 3) Take another stitch to secure the bud.
4) Continue to fold and roll, alternating the direction you fold, to the end of the strip, or until you feel the flower is thick enough. If your flower begins to distort and the bud starts to poke out, smoosh it flat.
5) Once you have achieved the desired thickness, tie off your thread.

6) Make 2 more flowers of various sizes.
Step 3 Attach flowers to necklace
1) You can hand stitch the flowers to the necklace or you can do the following:Arrange the flower cluster on a piece of felt. Make sure the felt is smaller than the flower arrangement and the same color as the necklace. Glue each flower to the felt (or hand stitch). Add a pin back and pin it to the necklace.


 Here is another version...
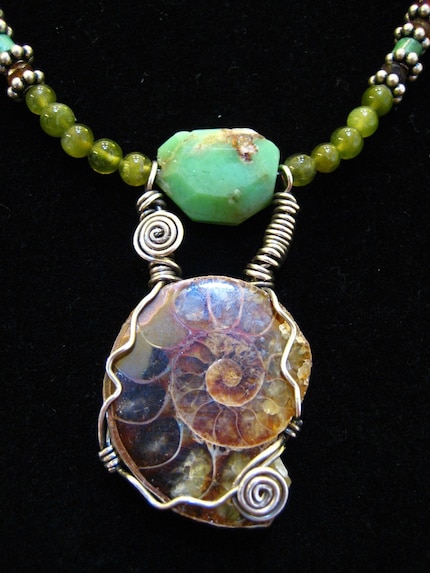
 With this necklace, I used smaller beads and wrapped the fabric around the beads as opposed to sliding the beads in a casing. Here's a great tute for this method. Also, I didn't hide the thread by sliding the needle under the fabric. Instead, I wrapped and pulled the thread to the next space and wrapped again. As you can see, rather than tying it in the back, I added another strand of beads and then hand stitch the ends together. After stitching the ends together, I wrapped the stitching with floss to make it pretty.
Dekor dekorasyon estetik tadilat bakım onarım